in: Sage 300 ERP, Sage 300 ERP Tips and Tricks
For various reasons it may become necessary to void a check or several. This can be achieved by making use a very simple process in Sage 300. In this example, we will work through the steps to void one or multiple checks.
Sage 300 General Ledger
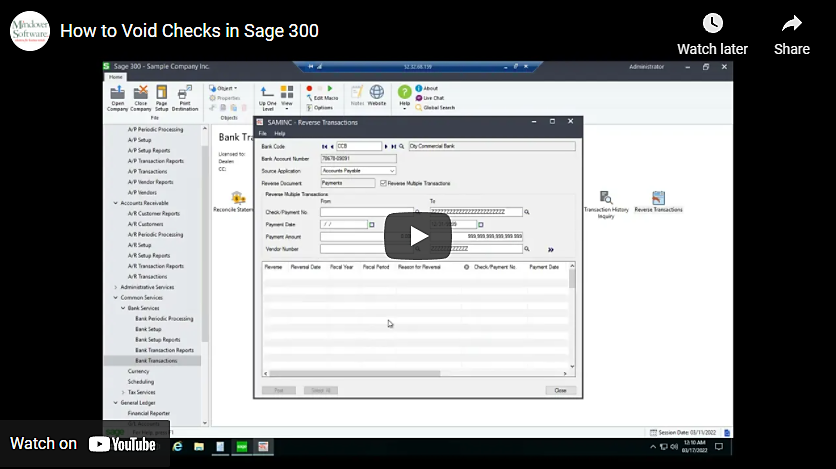
Start Sage 300 and navigate to Common Services à Bank Services à Bank Transactions à Reverse Transactions.

In the Reverse Transaction screen, click on the Finder icon to select the bank account on which the check will be voided.

Next, select the Source Application on which the check was issued. For this example, we will use Accounts Payable to void a check to a vendor that could not fulfill the order we issued a prepayment for.

Then, enter a reason for the reversal or void and enter an appropriate date; we will use the current date.

Once again, click on the Finder icon next to the Vendor Number field. Here is where the list of vendors will appear. Select the vendor that the check was issued to and click select.

Next, we need to select the check we need to void. From the Check/Payment field, click the finder and select the check to be reversed.

At this point, we need to review the transaction and make sure that everything is correct. Once we are satisfied with the information, we can post the transaction by clicking on Post. A message window will appear informing that the transaction posted successfully.

Now, let’s check ourselves. Repeating the same steps for entering the information for the vendor and check, we see that the check voided or reversed has been removed.

To reverse or void multiple or a series of checks, we will use the Reverse Multiple Transactions button. There are several ways to search for transactions to void. For this example, we will use the vendor number.

Select a vendor using the finder and click the Search icon. A list of checks that are eligible to reverse will appear.

There are two ways to void multiple checks. One is to select each check one at a time by double clicking in the Reverse column.

The second is to click Select All which will then highlight the whole table.

Again, once posted a message window will pop-up to inform of a successful completion.

The very last step is to go to the G/L Batch List and post the transactions to the general ledger.

