in: Acumatica Tips and Tricks, Acumatica Tips & Tricks, Acumatica, Company News
To properly process payroll in Acumatica, there are several steps that need to be in place. In this tutorial, we will learn the first of four steps, how to set up payment methods. In subsequent videos, we will explore the next steps in the sequence: configuring time tracking, work locations, and taxes. For this demo, we will set up predefined payment methods and cash accounts as well as define a direct deposit payment method. This will enable us to generate paychecks and pay employees.
Acumatica Payroll
To make a payment method available, we will use the Payment Methods form. Start Acumatica and navigate to Banking → Preferences → Payment Methods.

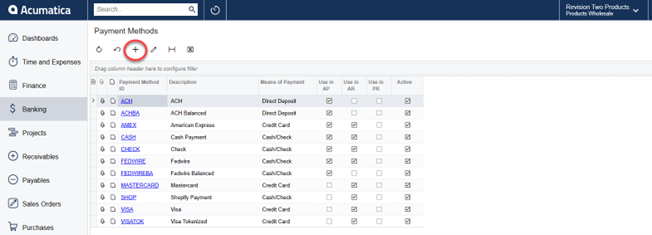
To set up a predefined payment method, on the Payment Method form, select the Check payment methods.
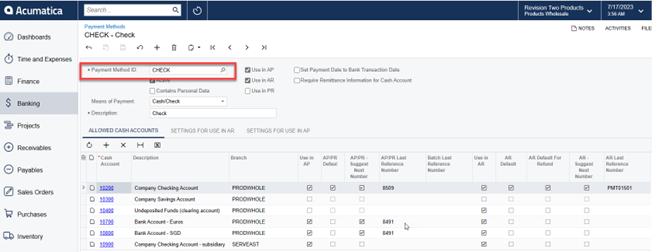
Check the Use in PR box. Leave the Use in AP and AR default boxes checked. Also, on the Allowed Cash Accounts tab, make sure the AP/PR Default and Use in PR box are selected for the account that needs to be specified for payroll use.
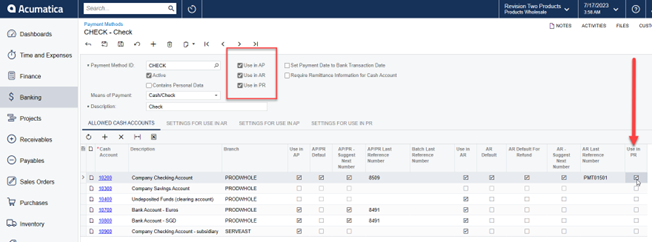
Go to the Settings for Use in PR tab and verify that Print Checks is selected, then select Pay Checks in the Report field. Click Save.

To set up a Direct Deposit payment method, open the Payment Methods form and create a new record. Enter the information as follows:
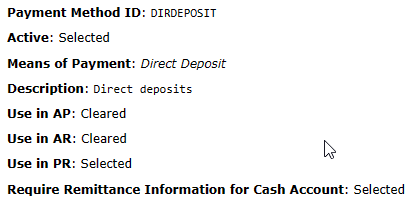

On the Allowed Cash Accounts tab, add a row by clicking on the (+), and select the appropriate cash account. Check the Use in PR and AP/PR Default boxes.

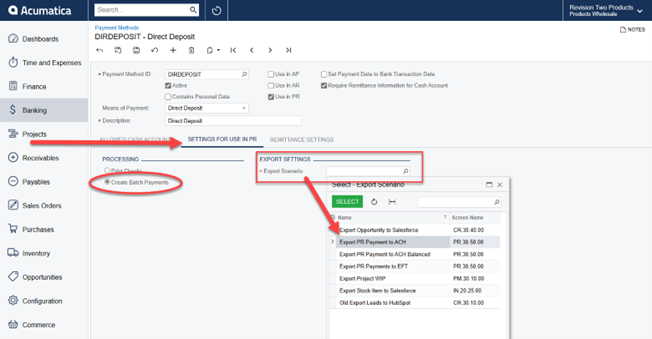
On the Settings for Use in PR tab, select Create Batch Payments. For the Export Scenario, select Export PR Payment to ACH.
On the Remittance Settings tab, insert six rows with the information from the table below. Note: each line will have to be entered one at a time.
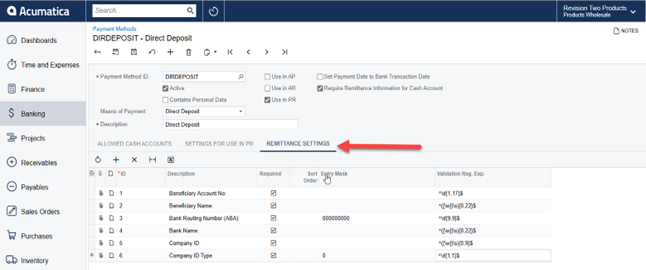
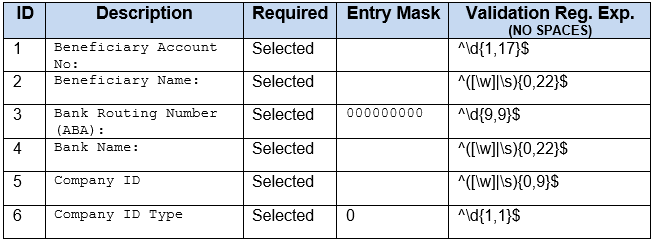
Once all information is entered, click Save.
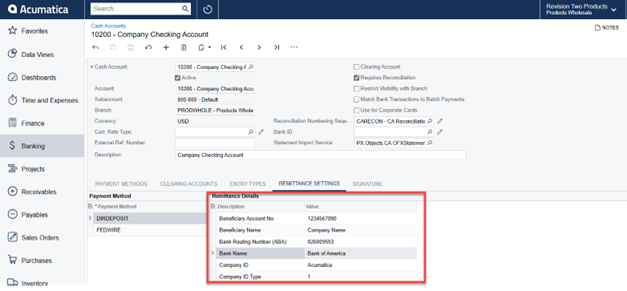
Finally, make sure to update Remittance Settings of the cash account. Go to the Cash Accounts form, and select the Remittance Settings tab. The following information should be entered per your specifications, then click Save.
